DISA360 Help Center


Authorization Forms – Non-Random Drug Tests
1. Log in to the website: www.disa.com. Select Login and then select DISA360
2. Click CREATE AUTHORIZATION FORM at the top of the screen (It is in the blue area and has a circle with a + sign)

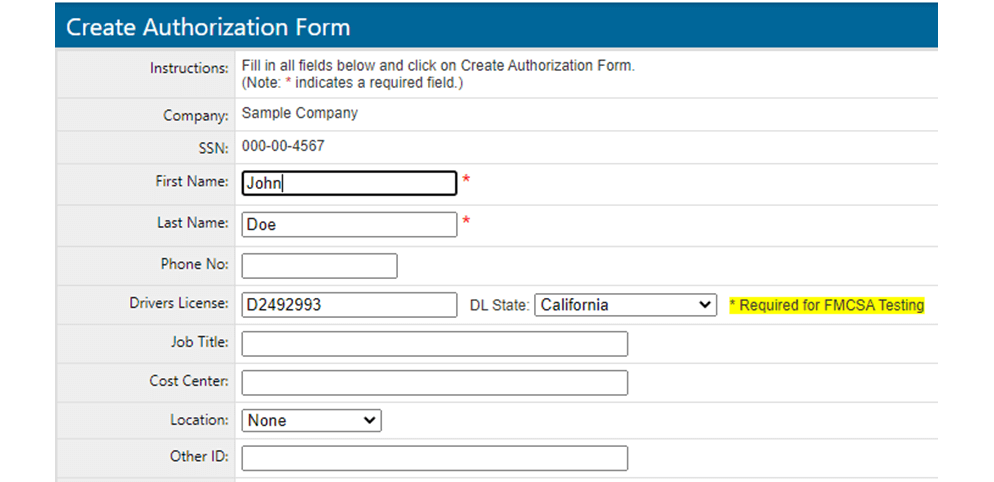
3. In the next screen enter the Company assigned employee ID as the driver’s license (State abbreviation and full license number Ex: CT123456789. click “Continue”

4. Complete the next screen by entering the employee’s first name, last name, driver license number and state. (You do not need to fill out the other fields).
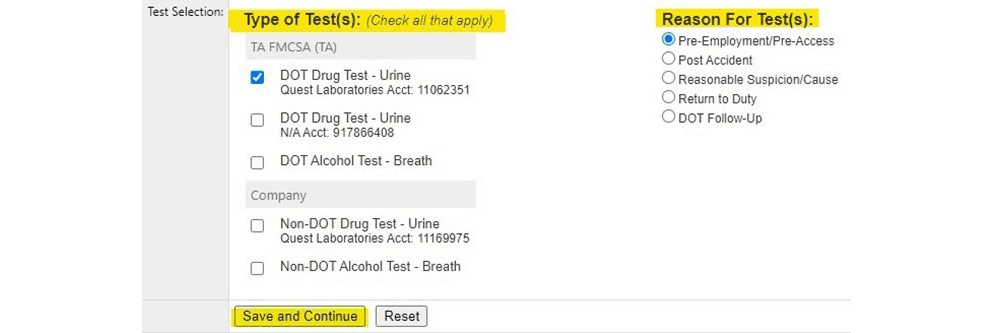
5. On the bottom of this page, select the test type. When you select the test type the “Reason For Test(s)” options will come up and you can select from the reasons provided. When you are selecting the test type, please be sure you are choosing the correct type between non-DOT and DOT. You can verify via the account number provided. When you have selected, click “save and continue”.
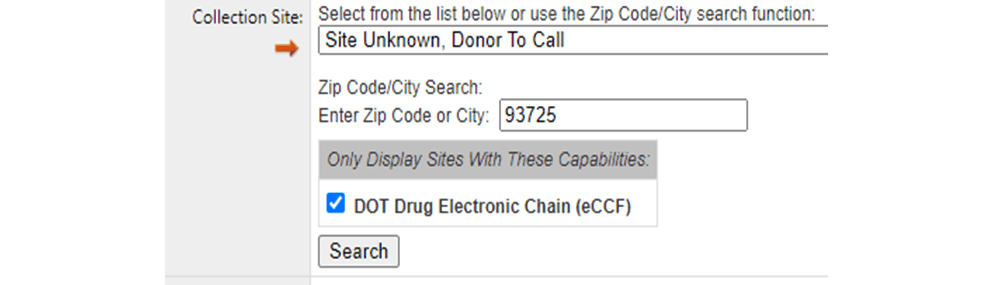
6. On this next screen, you will be searching for and choosing a collection site. Enter a zip code closest to where the employee will be located, check off DOT DRUG ELECTRONIC CHAIN then click “search”.
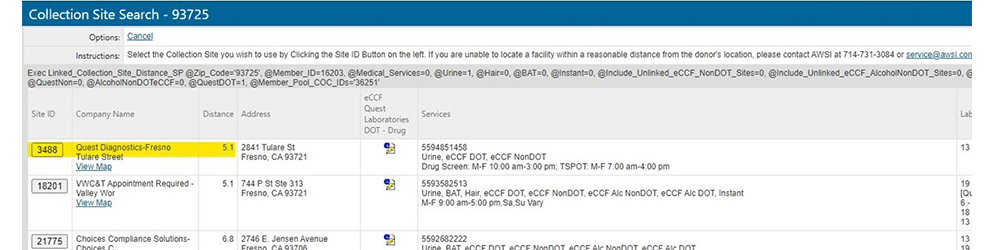
7. The next screen will show you a list of collection sites that perform the type of test that you selected. Select a collection site by clicking on the SITE ID where the employee will be tested.
8. This will bring you back to the previous screen with the collection site populated. Click “Create Authorization Form” at the bottom of the screen.
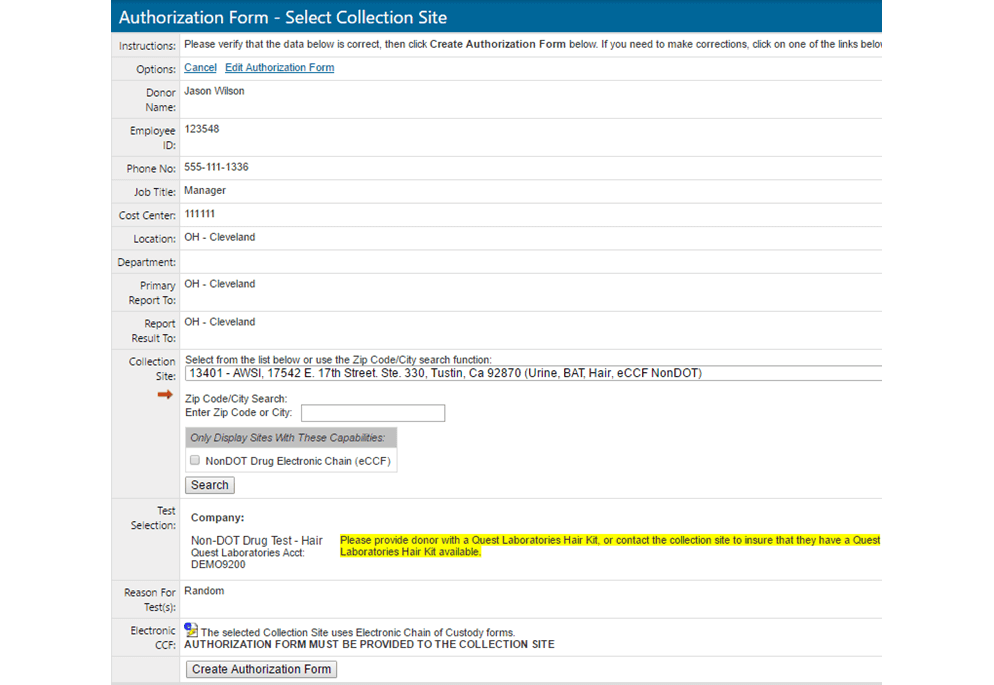
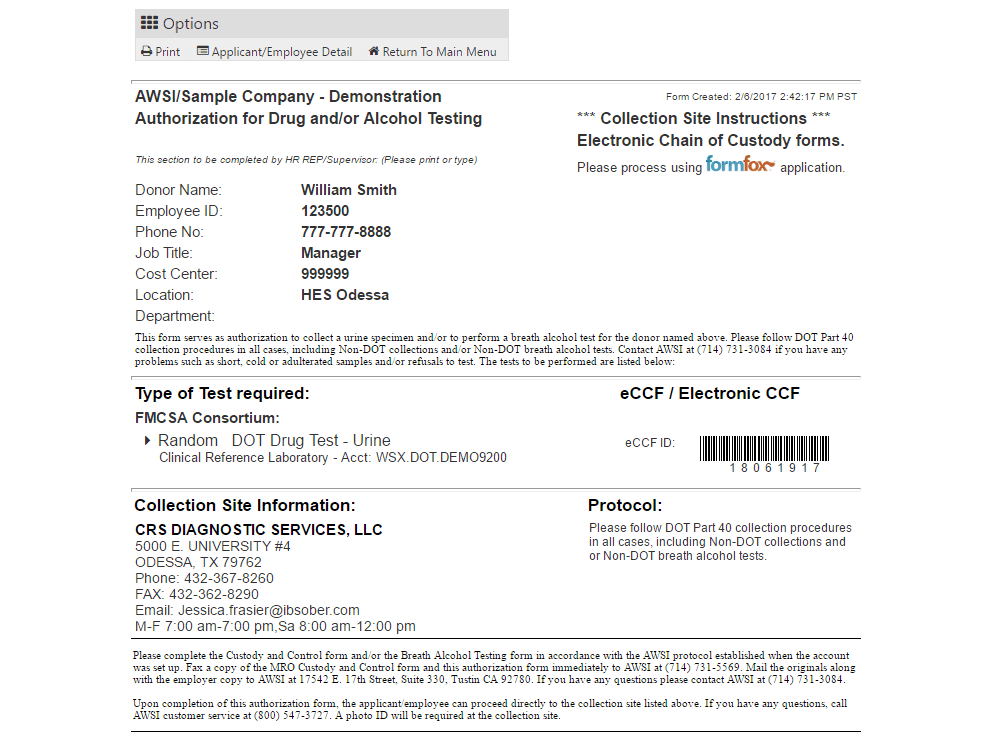
9. The Authorization Form will now come up on your screen. Check to make sure there is a barcode on the form. If it does not, please refer to the instructions below. If it does have a barcode, in the upper left corner of the form you have the option of either printing the form or emailing it. You must provide the Authorization Form to the employee. You can email the Authorization Form to the employee, as well as send it to the collection site, but the employee must bring the form with them.
10. Once you have provided the employee with the form, the employee can now proceed to the collection site printed on the form*.
*Due to COVID-19, please call the collection site prior to sending the employee to verify any specific protocols they have in place so you can plan accordingly. If you need to change a collection site, go to your home page in Disa360 and you can click on open Authorization Form(s). From here you can edit the existing Authorization Form by clicking “Edit”, which will be located all the way to the right of the details of each open Authorization Form in “options” *
When no barcode comes up on an Authorization Form: If you select a collection site that does not take electronic chains you will get no bar code on the authorization form, which means your employee will need to bring BOTH the authorization form you just created and a new QUEST 5-part chain of custody form. Whenever possible, use the electronic Authorization Forms. Their process is much more efficient and has far less room for errors in processing than the paper chains.
Please request Quest Chain of Custody forms from me if you do not have any. Keep in mind that Quest paper chains need to be mailed so there is a 7–10-day grace period for those to arrive to you. If you still have ANY forms other than the Quest forms throw them away immediately.
Alcohol Test Results: With the DISA360 when a driver takes an alcohol test, please make sure to have the driver bring you the copy of the result that is given to him or her. I will need you to email a copy to me, as it needs to be uploaded it to your account.
*Please note: If the test you are creating is a Return to Duty or Follow Up that needs to be observed, do not choose a Quest collection site, as they do not conduct observed tests. Also, always contact the collection site prior to sending the employee to make sure there is a same-gender observer on staff.